Page Group configuration
Last updated: March 20, 2026
Configuring page groups for your domain allows segmentation of Performance Monitoring and Page Analysis data in Noibu. This can provide valuable insights about performance and engagement on key ecommerce page types like product listing pages (PLPs), checkout, or search results.
By setting up page groups, you can better understand performance trends and user journeys across specific areas of your site, allowing for more targeted analysis and optimization.
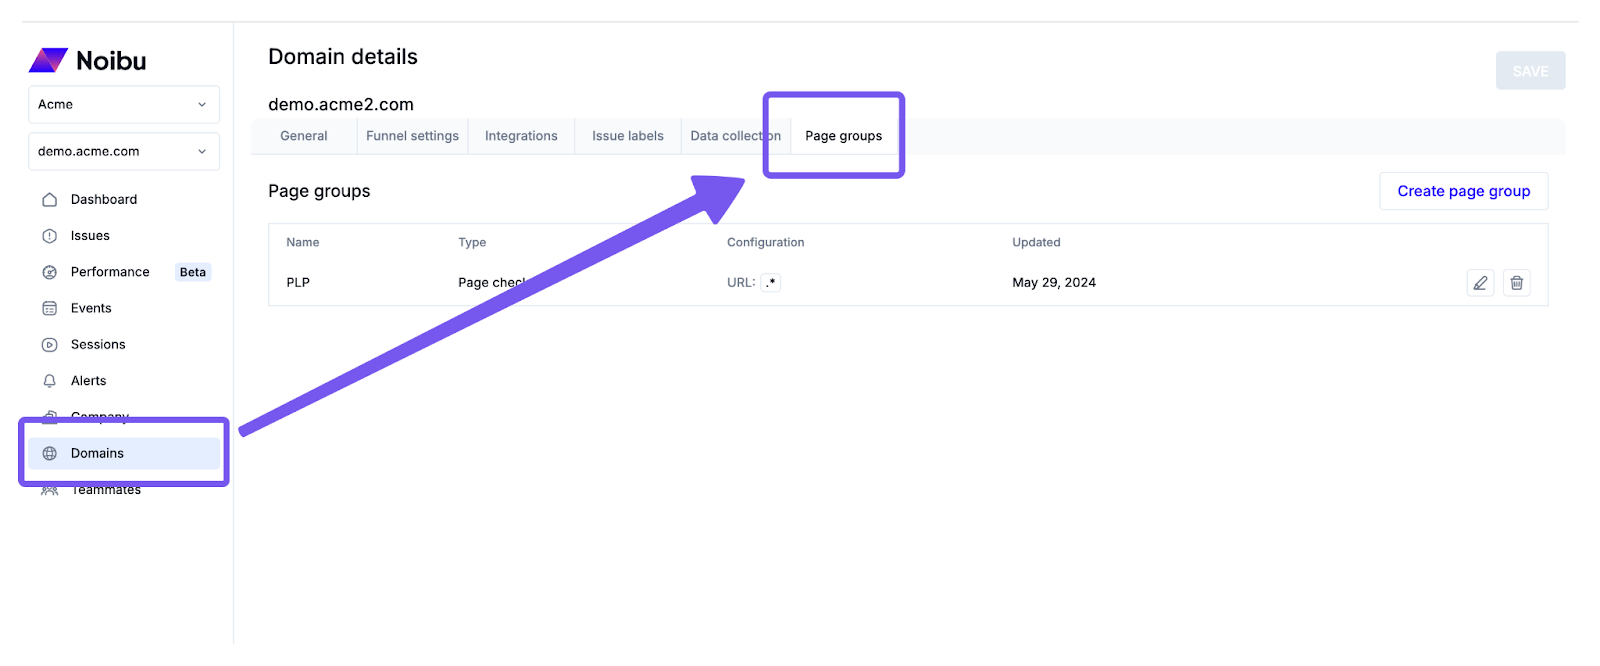
Go to the Domains page and click into the domain for which you want to configure page groups. Click the Page groups tab.
Creating a Page Group
Click Create page group to begin creating a page group. A pop-up will prompt you for several details.
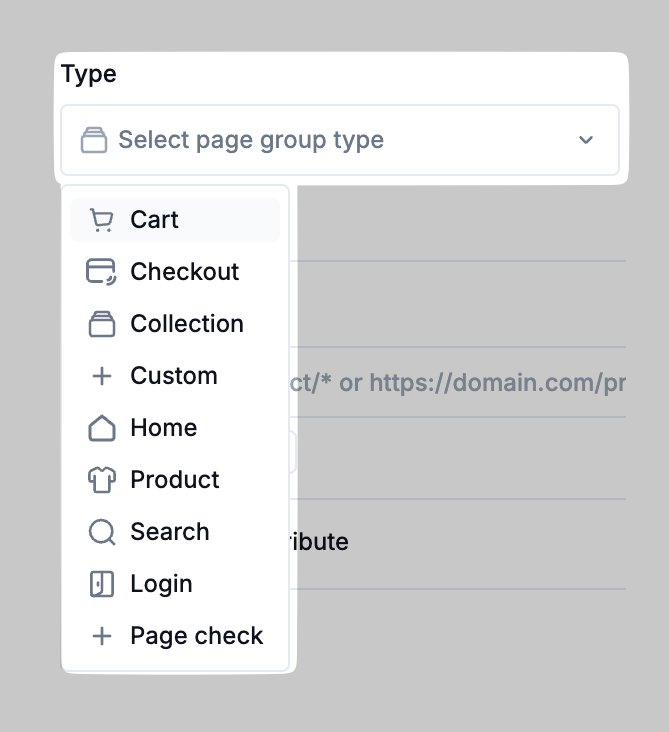
Type: the type of grouping this is. Choose from common ecommerce defaults such as Cart, Checkout, Product, Search, etc., or choose Custom to create your own grouping.
Display name: the name that will appear in the Page Groups dropdown in Noibu
Add pages: the method in which pages on your site will be assigned to the page group – by specifying a URL pattern, or by adding a HTML attribute to relevant pages on your site. See more details below.
Adding pages to page groups by URL pattern matching
Configuring page groups via URL pattern matching provides a good deal of flexibility and makes it easy to create and update groupings as needed. Choose the By URL option.
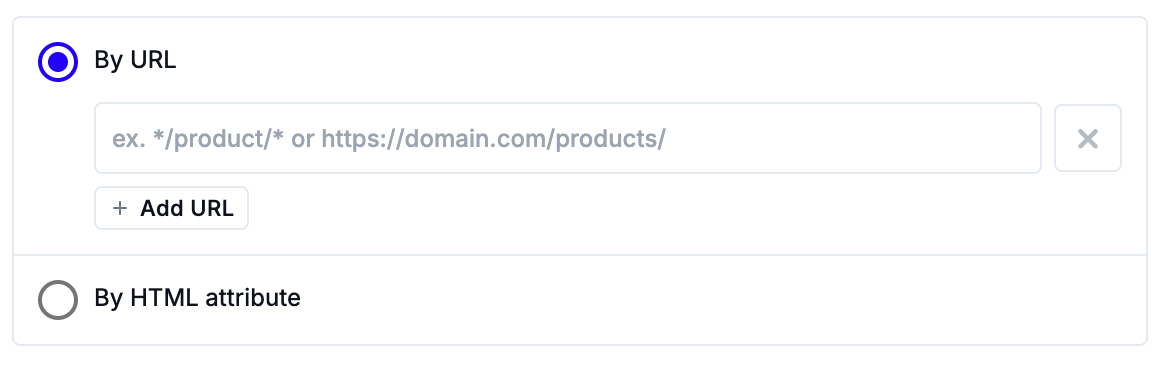
Using * as a wildcard character, specify the matching pattern or URL for pages to be included in this page group. For example:
*/product/*would include all pages whose URL contains “/product/” in the page group*pdppagewould include only pages whose URL ends with “pdppage” in the grouphttps://bestshopco.com/productswould include only a single page on this sitehttps://bestshopco.com/products*would include all pages nested under https://bestshopco.com/products
Click Add URL to add more URLs or URL patterns to the group.
Adding pages to page groups by HTML attribute
Page groups can also be configured by automatically adding pages to a group based on the presence of an HTML attribute. This method requires a developer to update your site’s code, and can be helpful for tracking every page using a specific template by including the identifier directly in the HTML.
Choose the By HTML attribute option.
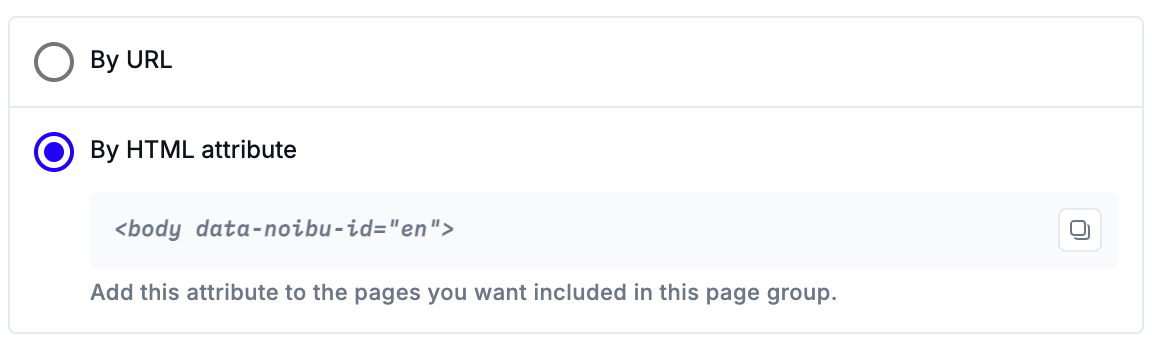
The display name of the page group determines the value for the HTML attribute. This can be added to any page(s) to be included in the page group. For example, create a page group called “products” and add this tag to the product page template, or any product page: <body data-noibu-id="products">
Note that although you can add multiple page group attributes to a page, each value must be applied individually to different elements. Using a <div> tag can be an effective way to do this. For example, if you want to classify a page in both the product and en page groups:
Correct:
<div data-noibu-id="product"></div><div data-noibu-id="en"></div>Incorrect:
<body data-noibu-id="product en">Incorrect:
<body data-noibu-id="product" data-noibu-id="en">
Editing and Deleting Page Groups
To edit an existing page group, click the pencil icon. To delete a page group, click the trash icon.
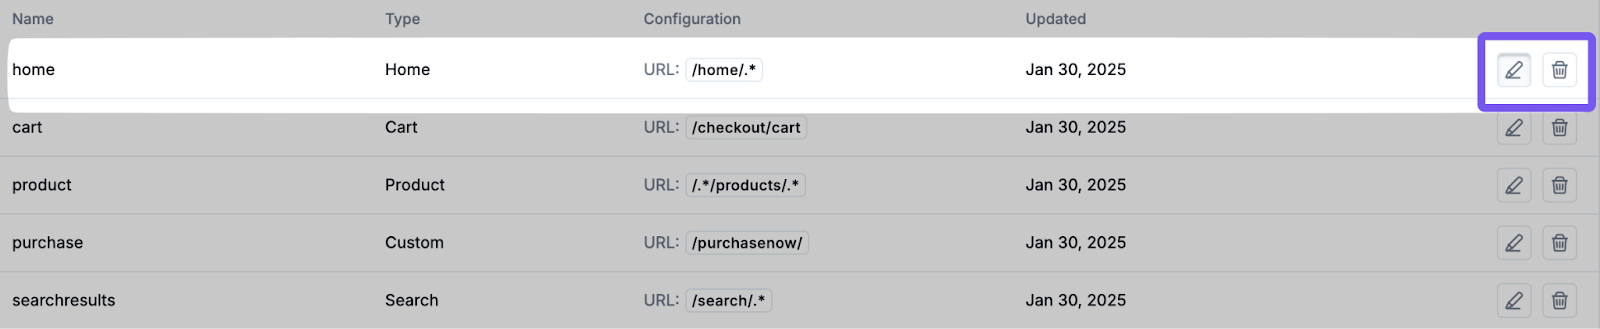
Note that when editing an existing page group, changes only apply moving forward, not retroactively. For example, if your Products page group was defined as */product/*, and you later added */products/* as an additional rule, pages under the /products/ URL would only display performance data from that point onward.
It takes approximately 24 hours for new or updated page groups to be reflected in Noibu’s systems.