Connecting Noibu to OpenAI Codex
Last updated: October 9, 2026
Noibu connects to Codex through two components: The MCP connector gives Codex access to live Noibu data, and Skills teach Codex how to run Noibu analyses. Both are required for Codex to run a Noibu analysis end-to-end.
Prerequisites
Codex Desktop App or CLI installed and set up.
If using Codex CLI: open PowerShell on Windows or Terminal on macOS and run:
codex --versionIf a version number appears, Codex CLI is installed. Skip installation and continue to the Noibu configuration.
If Windows reports that
codexis not recognized, install Codex using the Windows instructions.If macOS reports
command not found: codex, install Codex using the macOS instructions.
A Noibu account with valid login credentials (used for the OAuth step below)
Access to edit
~/.codex/config.tomlon the machine running Codex
1. Install the Noibu skills
In Codex, invoke the skill installer with the following GitHub folder:
$skill-installer https://github.com/Noibu/ai-plugin/tree/main/src/skills
Codex installs these seven skills into
~/.codex/skills:build-business-contextcheckout-analysisproduct-analysisquerying-noibu-datasegment-analysisstore-pulsetech-diagnosis
2. Configure the Noibu MCP connector
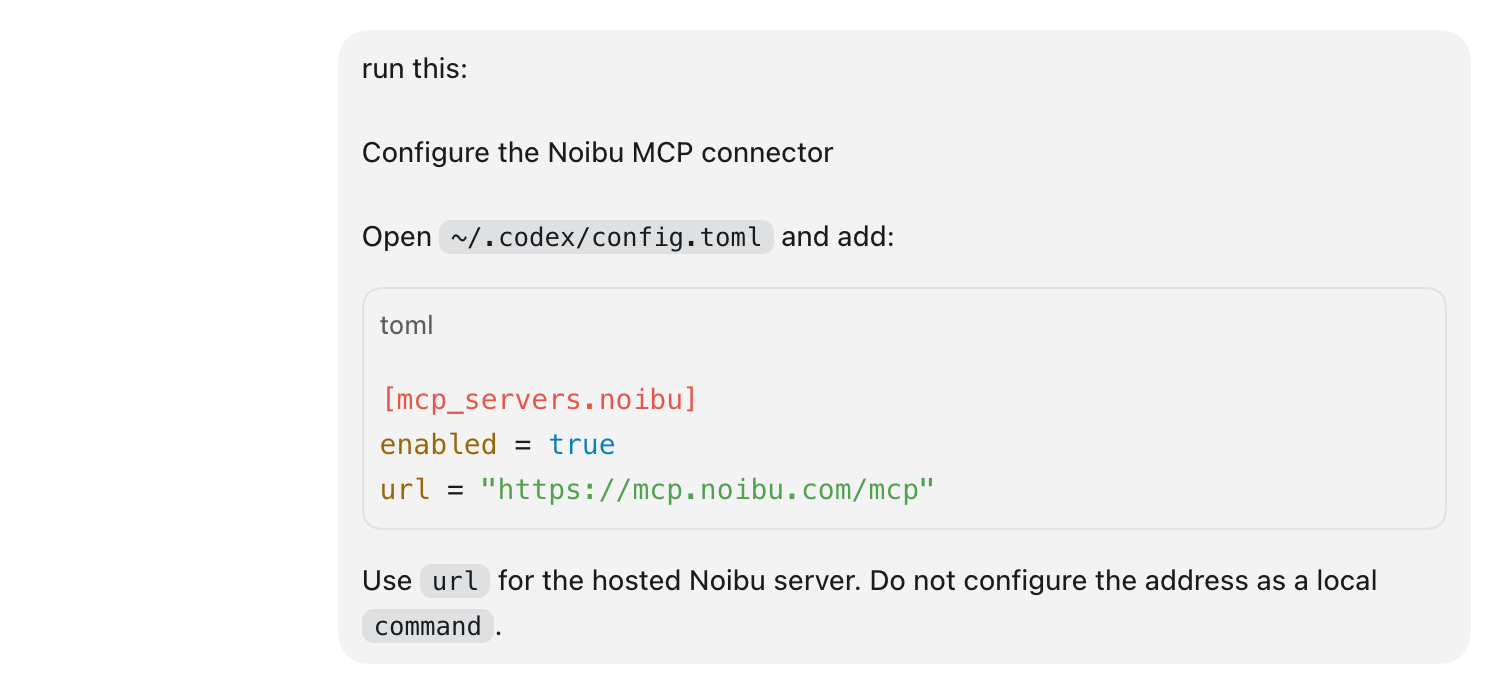
Open a New Task
Run:
Open ~/.codex/config.toml and add:

[mcp_servers.noibu]
enabled = true
url = "https://mcp.noibu.com/mcp"

Use url for the hosted Noibu server. Do **not** configure the address as a local command — Noibu's MCP server is hosted, not run locally.
Alternatively:
Go to Settings → Configuration in Codex.
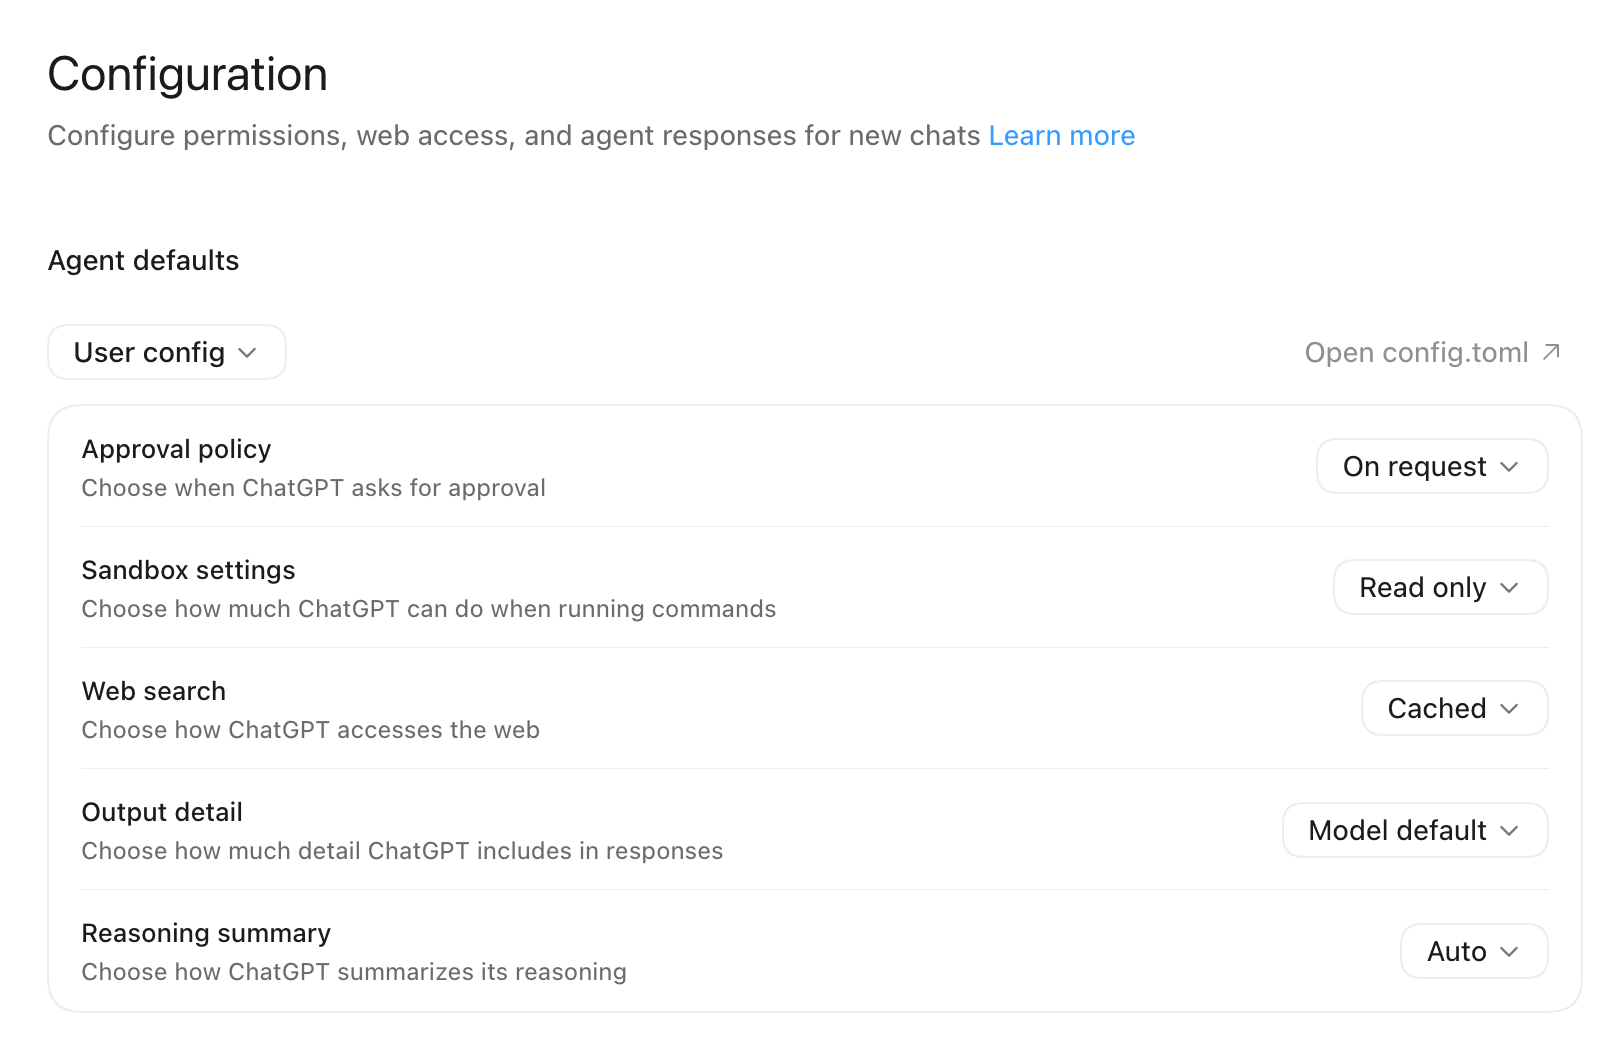
Open
~/.codex/config.tomland add:
[mcp_servers.noibu]
enabled = true
url = "https://mcp.noibu.com/mcp"
Use url for the hosted Noibu server. Do not configure the address as a local command — Noibu's MCP server is hosted, not run locally.
3. Authenticate with Noibu (OAuth)
Noibu's MCP server uses OAuth (browser login), not a static bearer token, so there's nothing extra to add to config.toml for authentication.
Run:
codex mcp login noibuApprove the login in the browser window that opens. Once approved, codex mcp list will show Auth: OAuth for the Noibu server.
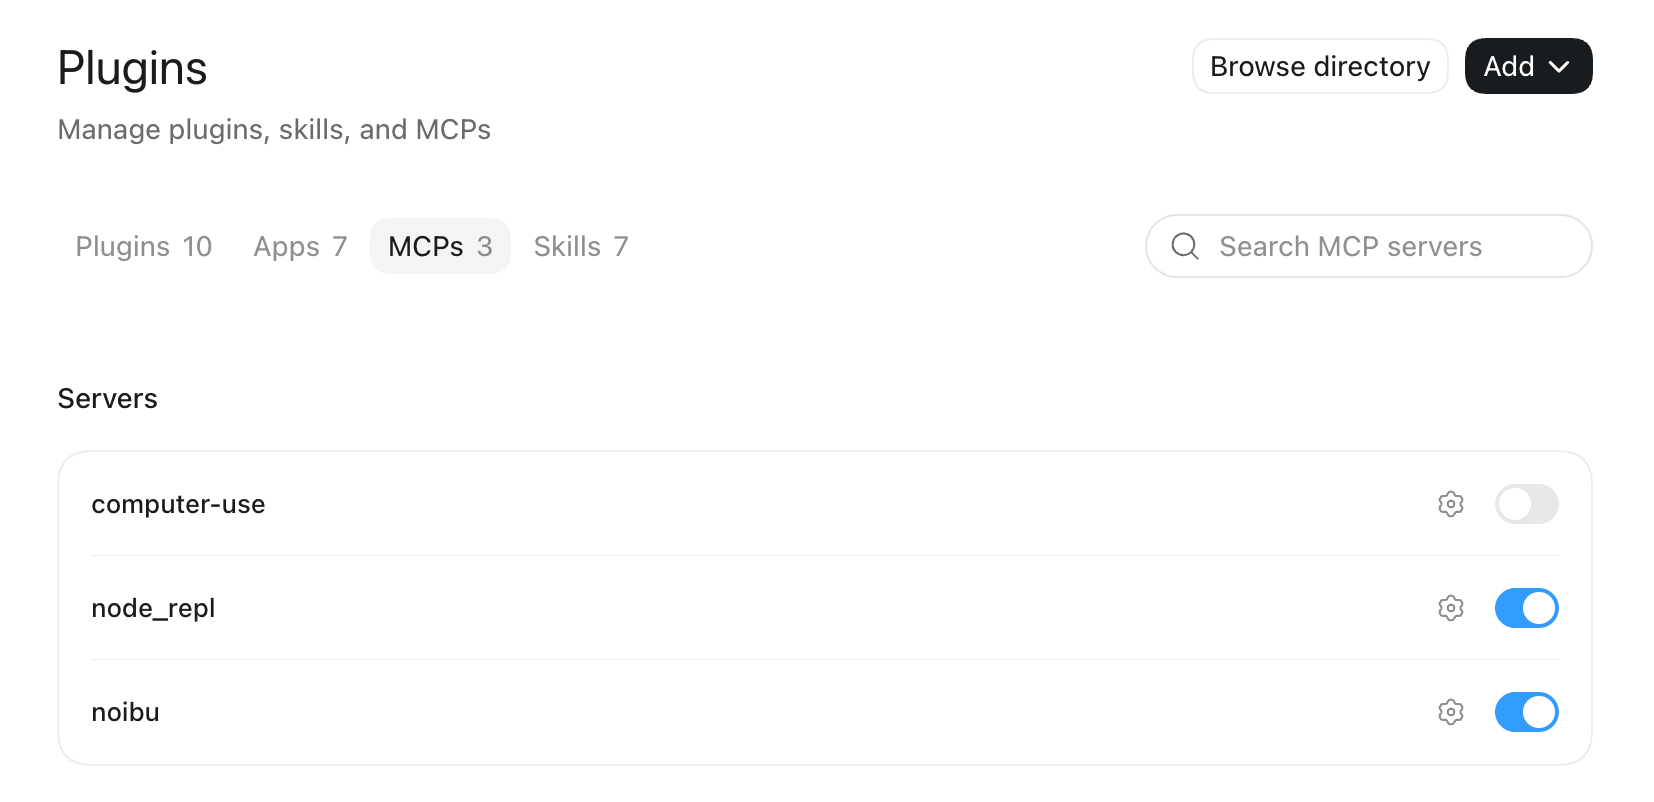
Alternatively, you can authenticate from the UI:
Go to Settings → Plugins → MCPs
Find Noibu and click Authenticate
Sign in with your Noibu credentials in the browser window that opens
If you encounter an error when attempting to authenticate, refer to the Troubleshooting section below.
4. Reload Codex and test the connection
Restart Codex.
Open a new task.
Verify the connection
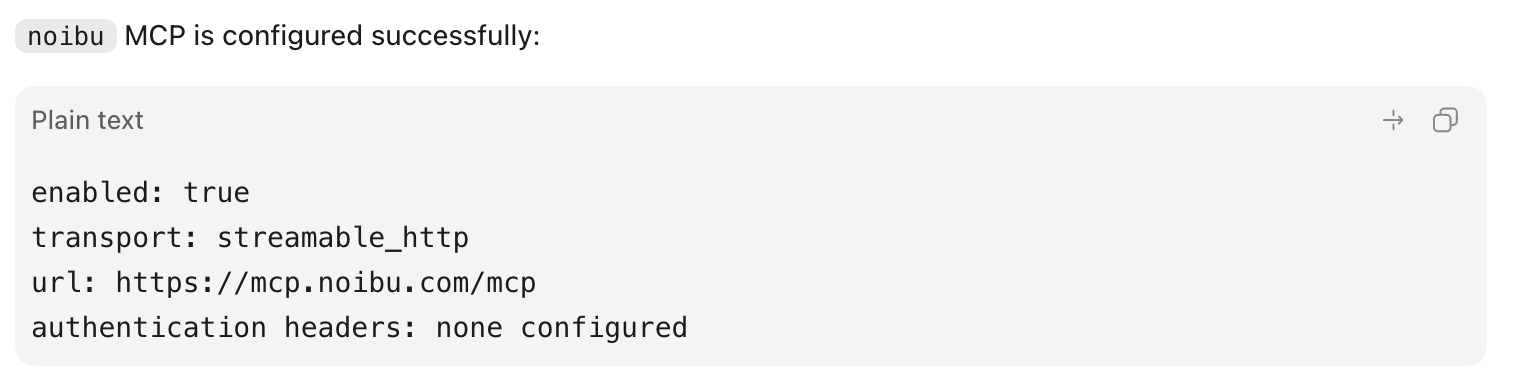
Run:
codex mcp get noibuThe result should show the connector as enabled, using the streamable_http transport, with URL https://mcp.noibu.com/mcp.
Ask Codex to run a Noibu analysis, for example: run /store-pulse on yourdomain.com
Troubleshooting
Codex CLI Installation Error
522 error: the requested URL returned error: 522means the service/CDN could not reach its origin server in time. It’s a temporary server/network-path issue, not a problem with your Mac or shell.Try again in a few minutes. If it persists, try this command or install through Homebrew or npm instead:
curl -fsSL https://chatgpt.com/codex/install.sh | CODEX_INSTALLER_USE_RELEASES_OPENAI_COM=false shbrew install --cask codexnpm install -g @openai/codex
Resolve the
invalid_clientauthentication errorWhile trying to authenticate to Noibu, if the browser displays an error such as:
{
  "error": "invalid_client",
  "error_description": "redirect_uri is not listed in client metadata"
}
This means Noibu rejected the OAuth callback registered through Codex’s default client-metadata flow. Force Codex to use Dynamic Client Registration instead.
Run the following command :
For Windows PowerShell or macOS Terminal:
codex mcp login noibu --oauth-client-registration dcrFor macOS Terminal
/Applications/ChatGPT.app/Contents/Resources/codex mcp login noibu --oauth-client-registration dcr
Complete the Noibu authentication in the browser window that opens. After authentication succeeds, restart the ChatGPT desktop app.
"No bearer token configured" message — this is expected. Noibu MCP uses OAuth rather than a static token, so
bearer_token_env_vardoes not apply here; it's only relevant for token-based MCP servers.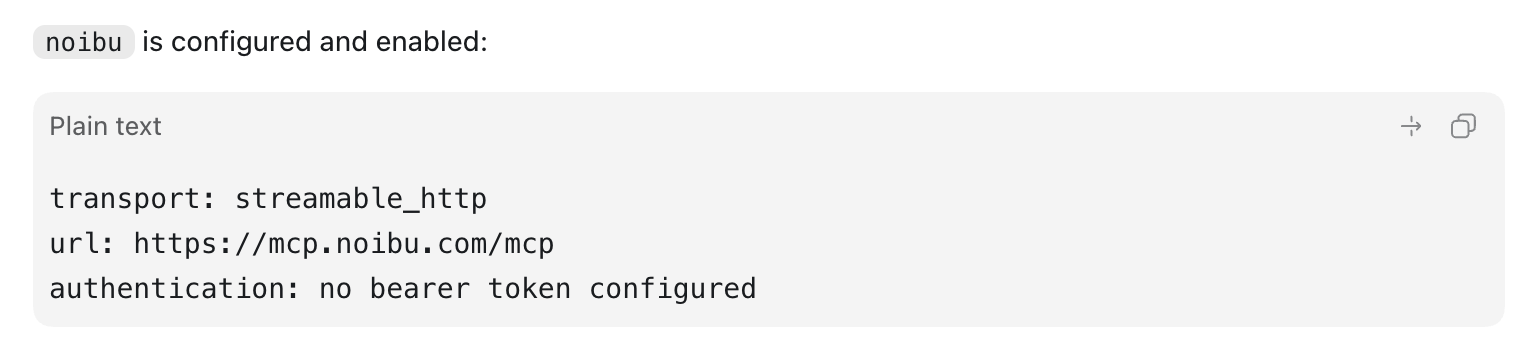
If
codex mcp login noibudoesn't open a browser window or the login fails, re-check that theurlinconfig.tomlmatches exactlyhttps://mcp.noibu.com/mcpand thatenabled = trueis set.
When conducting a Noibu Analysis, if Codex responds and says that the Noibu data connection isn’t available, this likely means that you need to Authenticate the Noibu MCP connection - see Step 3