Installing and updating the Noibu plugin for Claude
Last updated: July 15, 2026
This guide walks you through the one-time setup for the Noibu plugin for Claude. By the end, Noibu will be set up and collecting data, the plugin will be installed in Claude Cowork, and your ecommerce data will be connected and ready to query.
Prerequisites
Before installing the Noibu plugin for Claude, you will need to have completed these prerequisite steps:
Set up your account with Noibu. After Noibu sets up your company and domain, you will receive a welcome email with a link to finish setting up your account with Noibu.
Deploy Noibu to your ecommerce website. You will need to deploy Noibu’s script on your website to collecting session and page visit data from your store. Install it as early as possible so Noibu has data to work with by the time you start using the plugin in Claude. For full details, see this article.
Install Claude desktop app. The Noibu plugin runs inside Claude Cowork, which is available through Claude's desktop app. If you don't already have a Claude account, you'll need to create one before continuing.
Download Noibu plugin for Claude. The latest version of our plugin is available for download here.
(Teams & Enterprise plans only) Enable Cowork access and Skills for your organization. If on a Claude Team or Enterprise plan, you may also need to ensure that skills are enabled for your organization.
Noibu plugin setup
By installing and using the Noibu Plugin for Claude, you agree to Noibu’s MCP Terms and Privacy Policy.
Step 1 — Install the Noibu plugin in Claude
➡ If on a Pro or Max plan for Claude:
In Claude Cowork, upload and install a custom plugin as described in Anthropic’s documentation. Upload the Noibu plugin file.
A confirmation message will let you know the plugin is installed. Continue to install and activate the Custom Connector as described in Step 2.
➡ If on a Teams or Enterprise plan for Claude:
You must have admin access to install the plugin. In Claude Cowork, manually install a custom plugin for your organization as described in Anthropic’s documentation.
Configure the plugin with the following settings:
Marketplace name:Noibu
User access:Installed by default
Each user at your organization is now able to install and activate the Custom Connector as described in Step 2.
Step 2 – Activate the Noibu MCP server in Claude
After uploading the Noibu plugin, and add a Custom Connector following Anthropic’s documentation.
Configure the Custom Connector with the following settings:
Name:Noibu
URL:https://mcp.noibu.com/mcp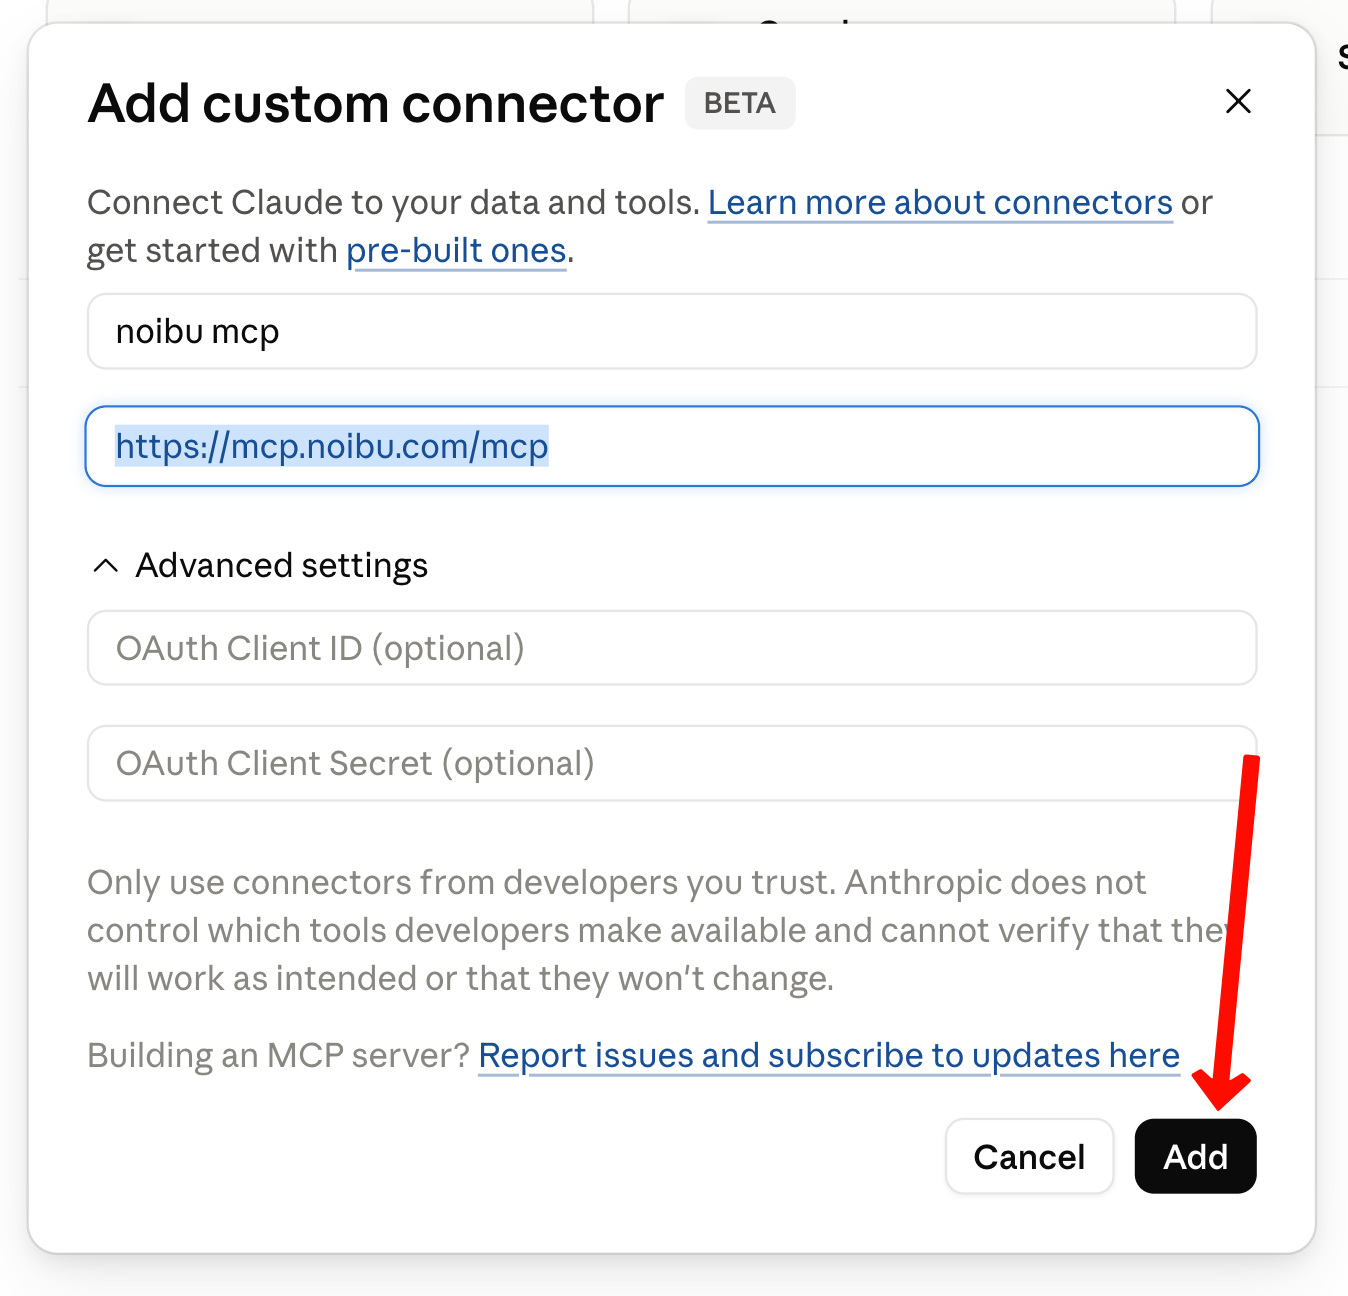
Click Add
Click Connect and then authenticate to your Noibu account.
Next steps — Begin analysis with Claude and Noibu
Once Claude is successfully connected, you can ask it to explore and analyze data about conversions, journey drop-offs, acquisition, funnel progression, user experience, technical errors, and more. Learn more here.
Updating the plugin
As we continue to iterate and improve on our Claude plugin, new and updated Skills may become available. To update your plugin, repeat the steps for installing the Noibu plugin. When you upload the latest plugin file you'll be prompted to overwrite the current version.
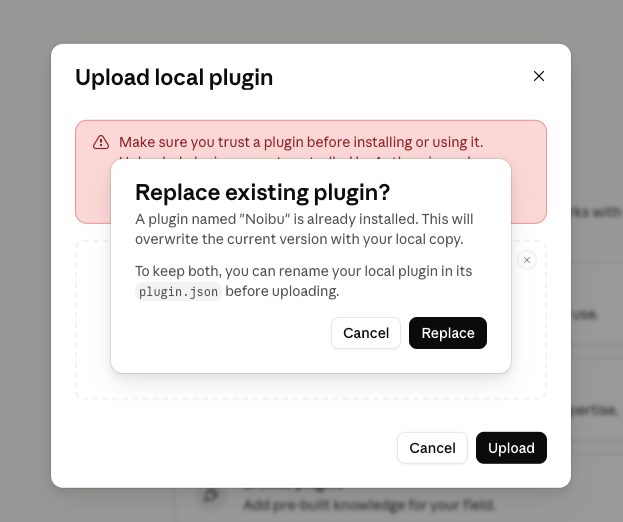
After replacing the existing plugin, a confirmation message will let you know the updated plugin is installed and ready to use.