Creating an A/B test
Last updated: October 9, 2026
Creating an A/B test in Noibu is a guided flow that answers three questions: what you are testing, how you will measure it, and who sees it. Nothing is live until your development team implements the variation code and you start the test, so you can create a test and return to it later.
This article covers the setup flow in Noibu. For the code your developers implement afterwards, see Implementing an A/B test.
Note: This feature is currently in beta. Beta features are still in development as we test and evaluate. They may have limited functionality and can change without notice.
Creating a test
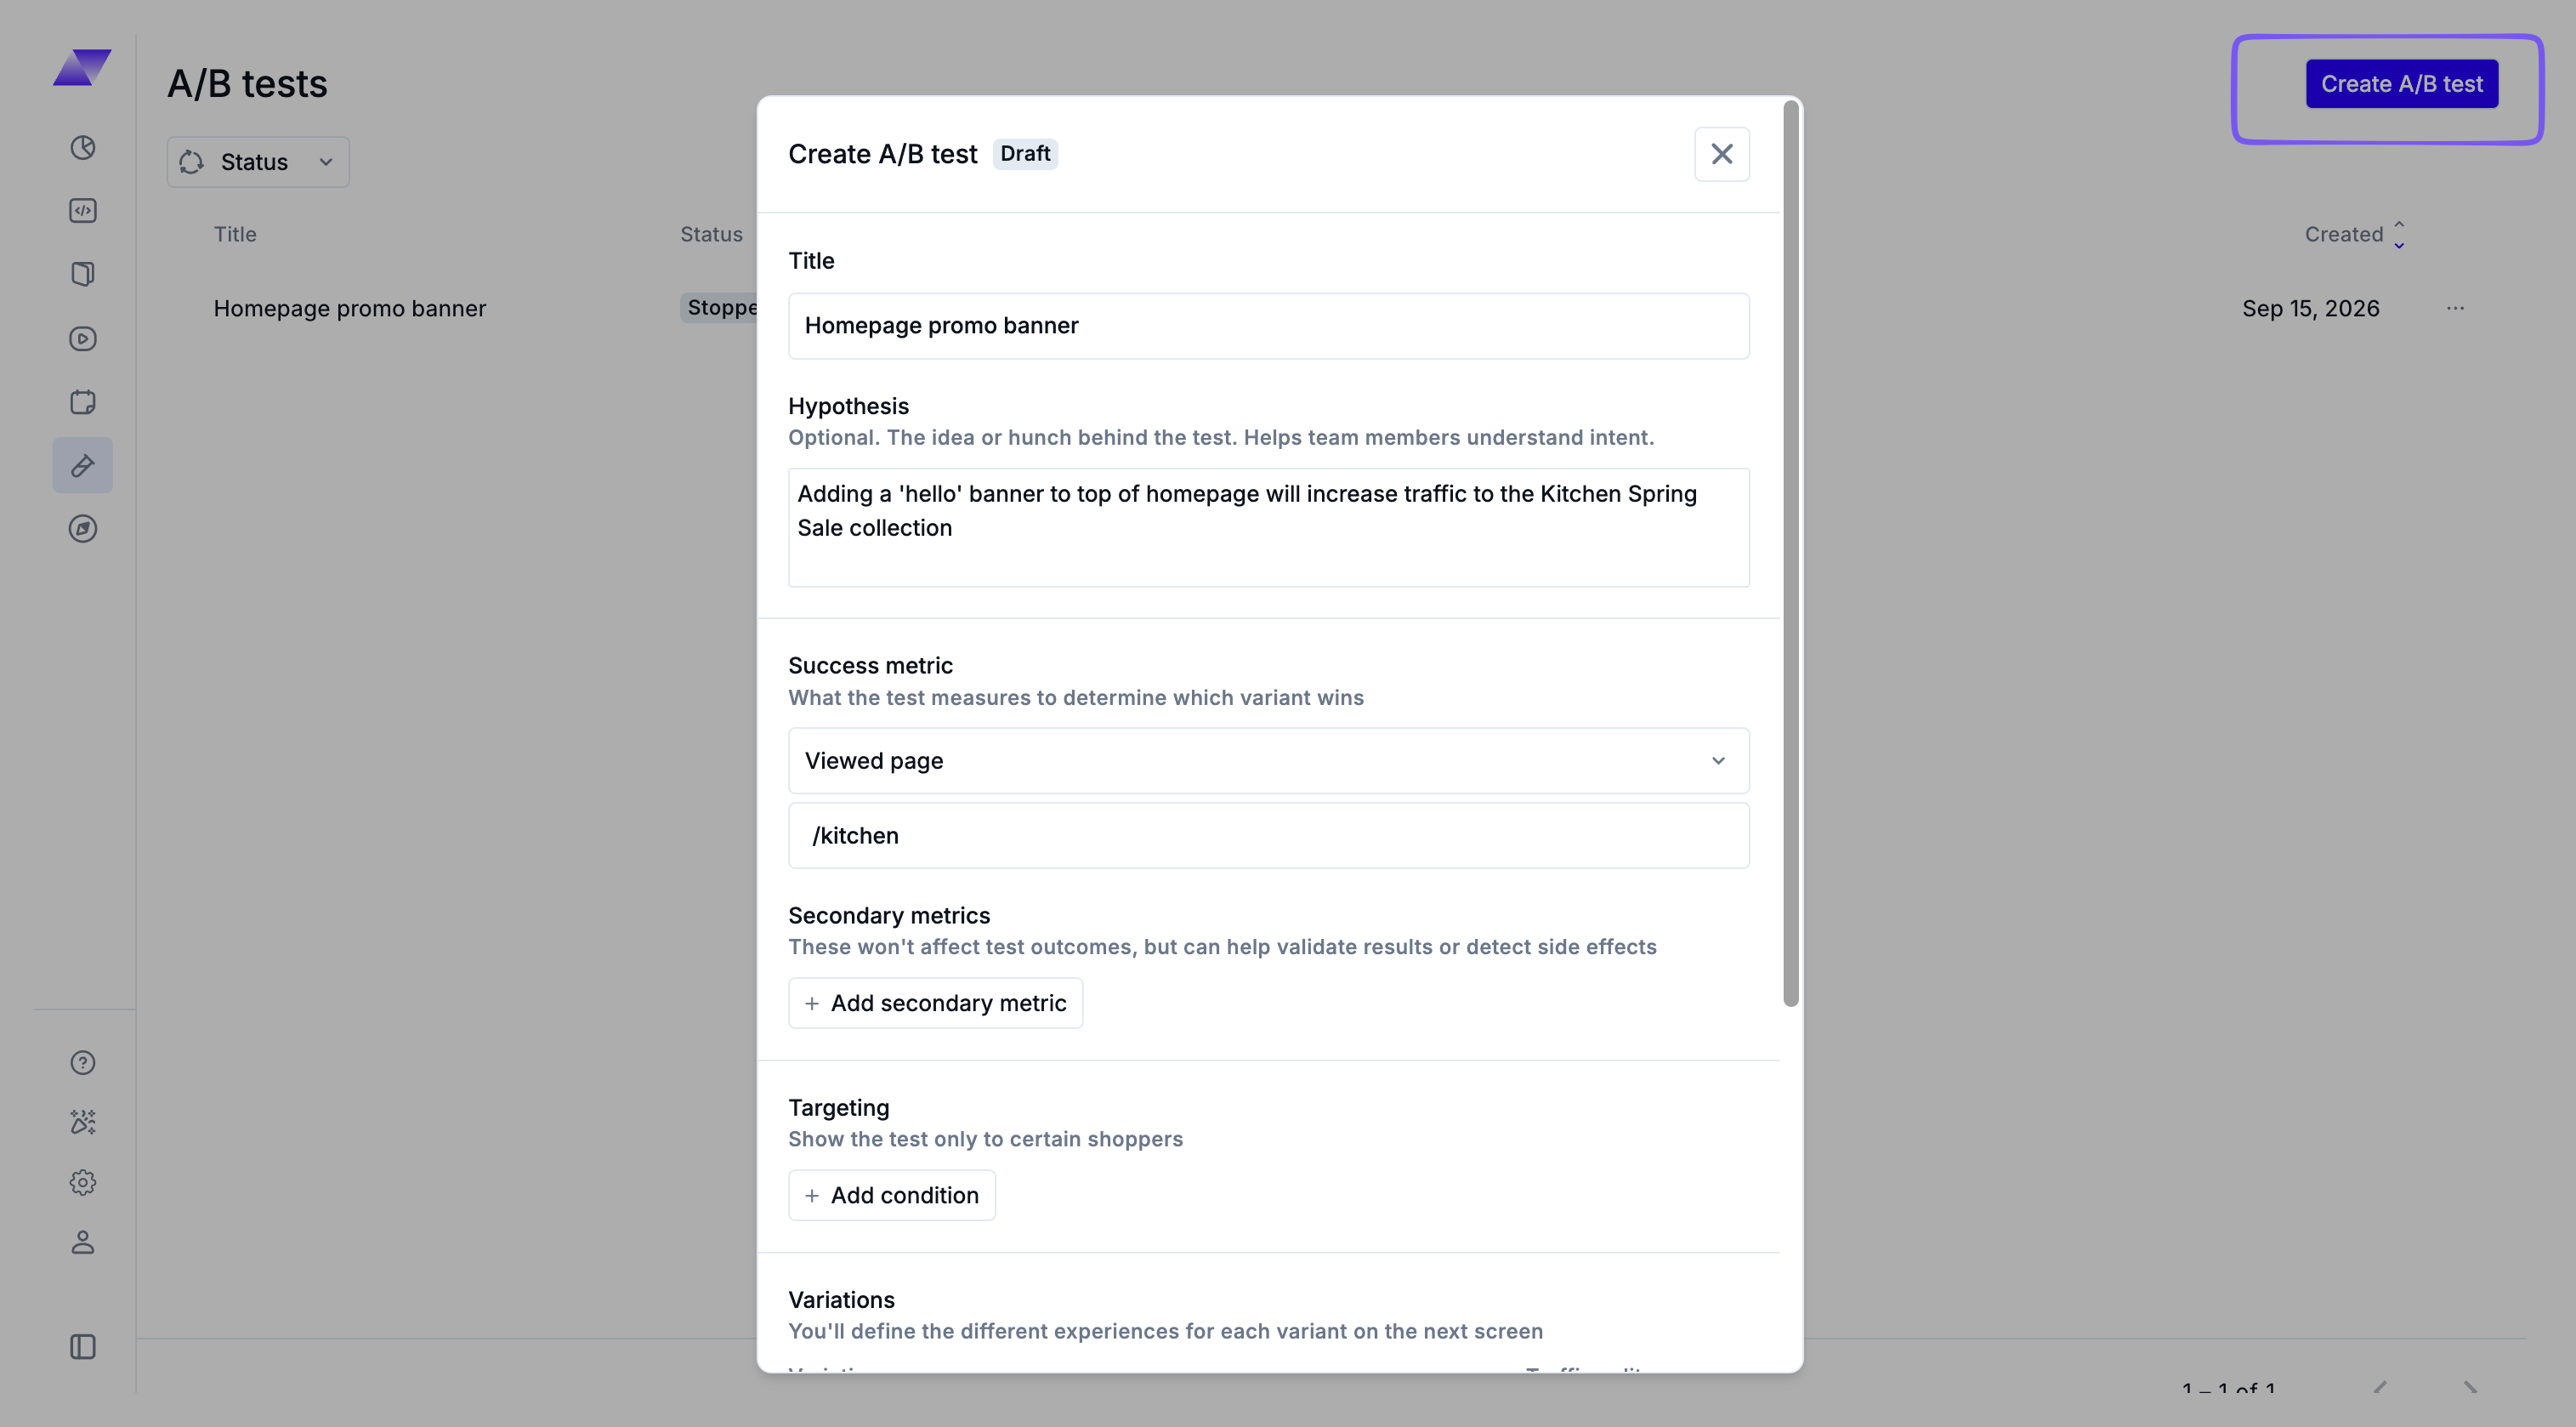
From the A/B tests page, click Create A/B test.
Enter a title. Noibu creates a URL-safe slug from the title, and your developers use that slug as the flag key in code.
Optionally, enter a hypothesis. This is a descriptive field that helps your team understand the intent of the test. It does not affect how the test runs or how results are calculated.
Choose a primary success metric. This is the only metric that decides the outcome. See Success metrics below.
Optionally, add up to three secondary metrics for additional context.
Optionally, specify targeting to limit the test to a subset of visitors. See Targeting rules below.
Set your variations and traffic split. See Variations and traffic split below.
You can also create tests from Claude. The A/B Test Opportunity Finder skill in the Noibu AI plugin recommends tests based on your store's data and creates the ones you choose as drafts, with the title, hypothesis, metrics, targeting, and variations already filled in. You can review and edit a draft on the A/B tests page before you start it.
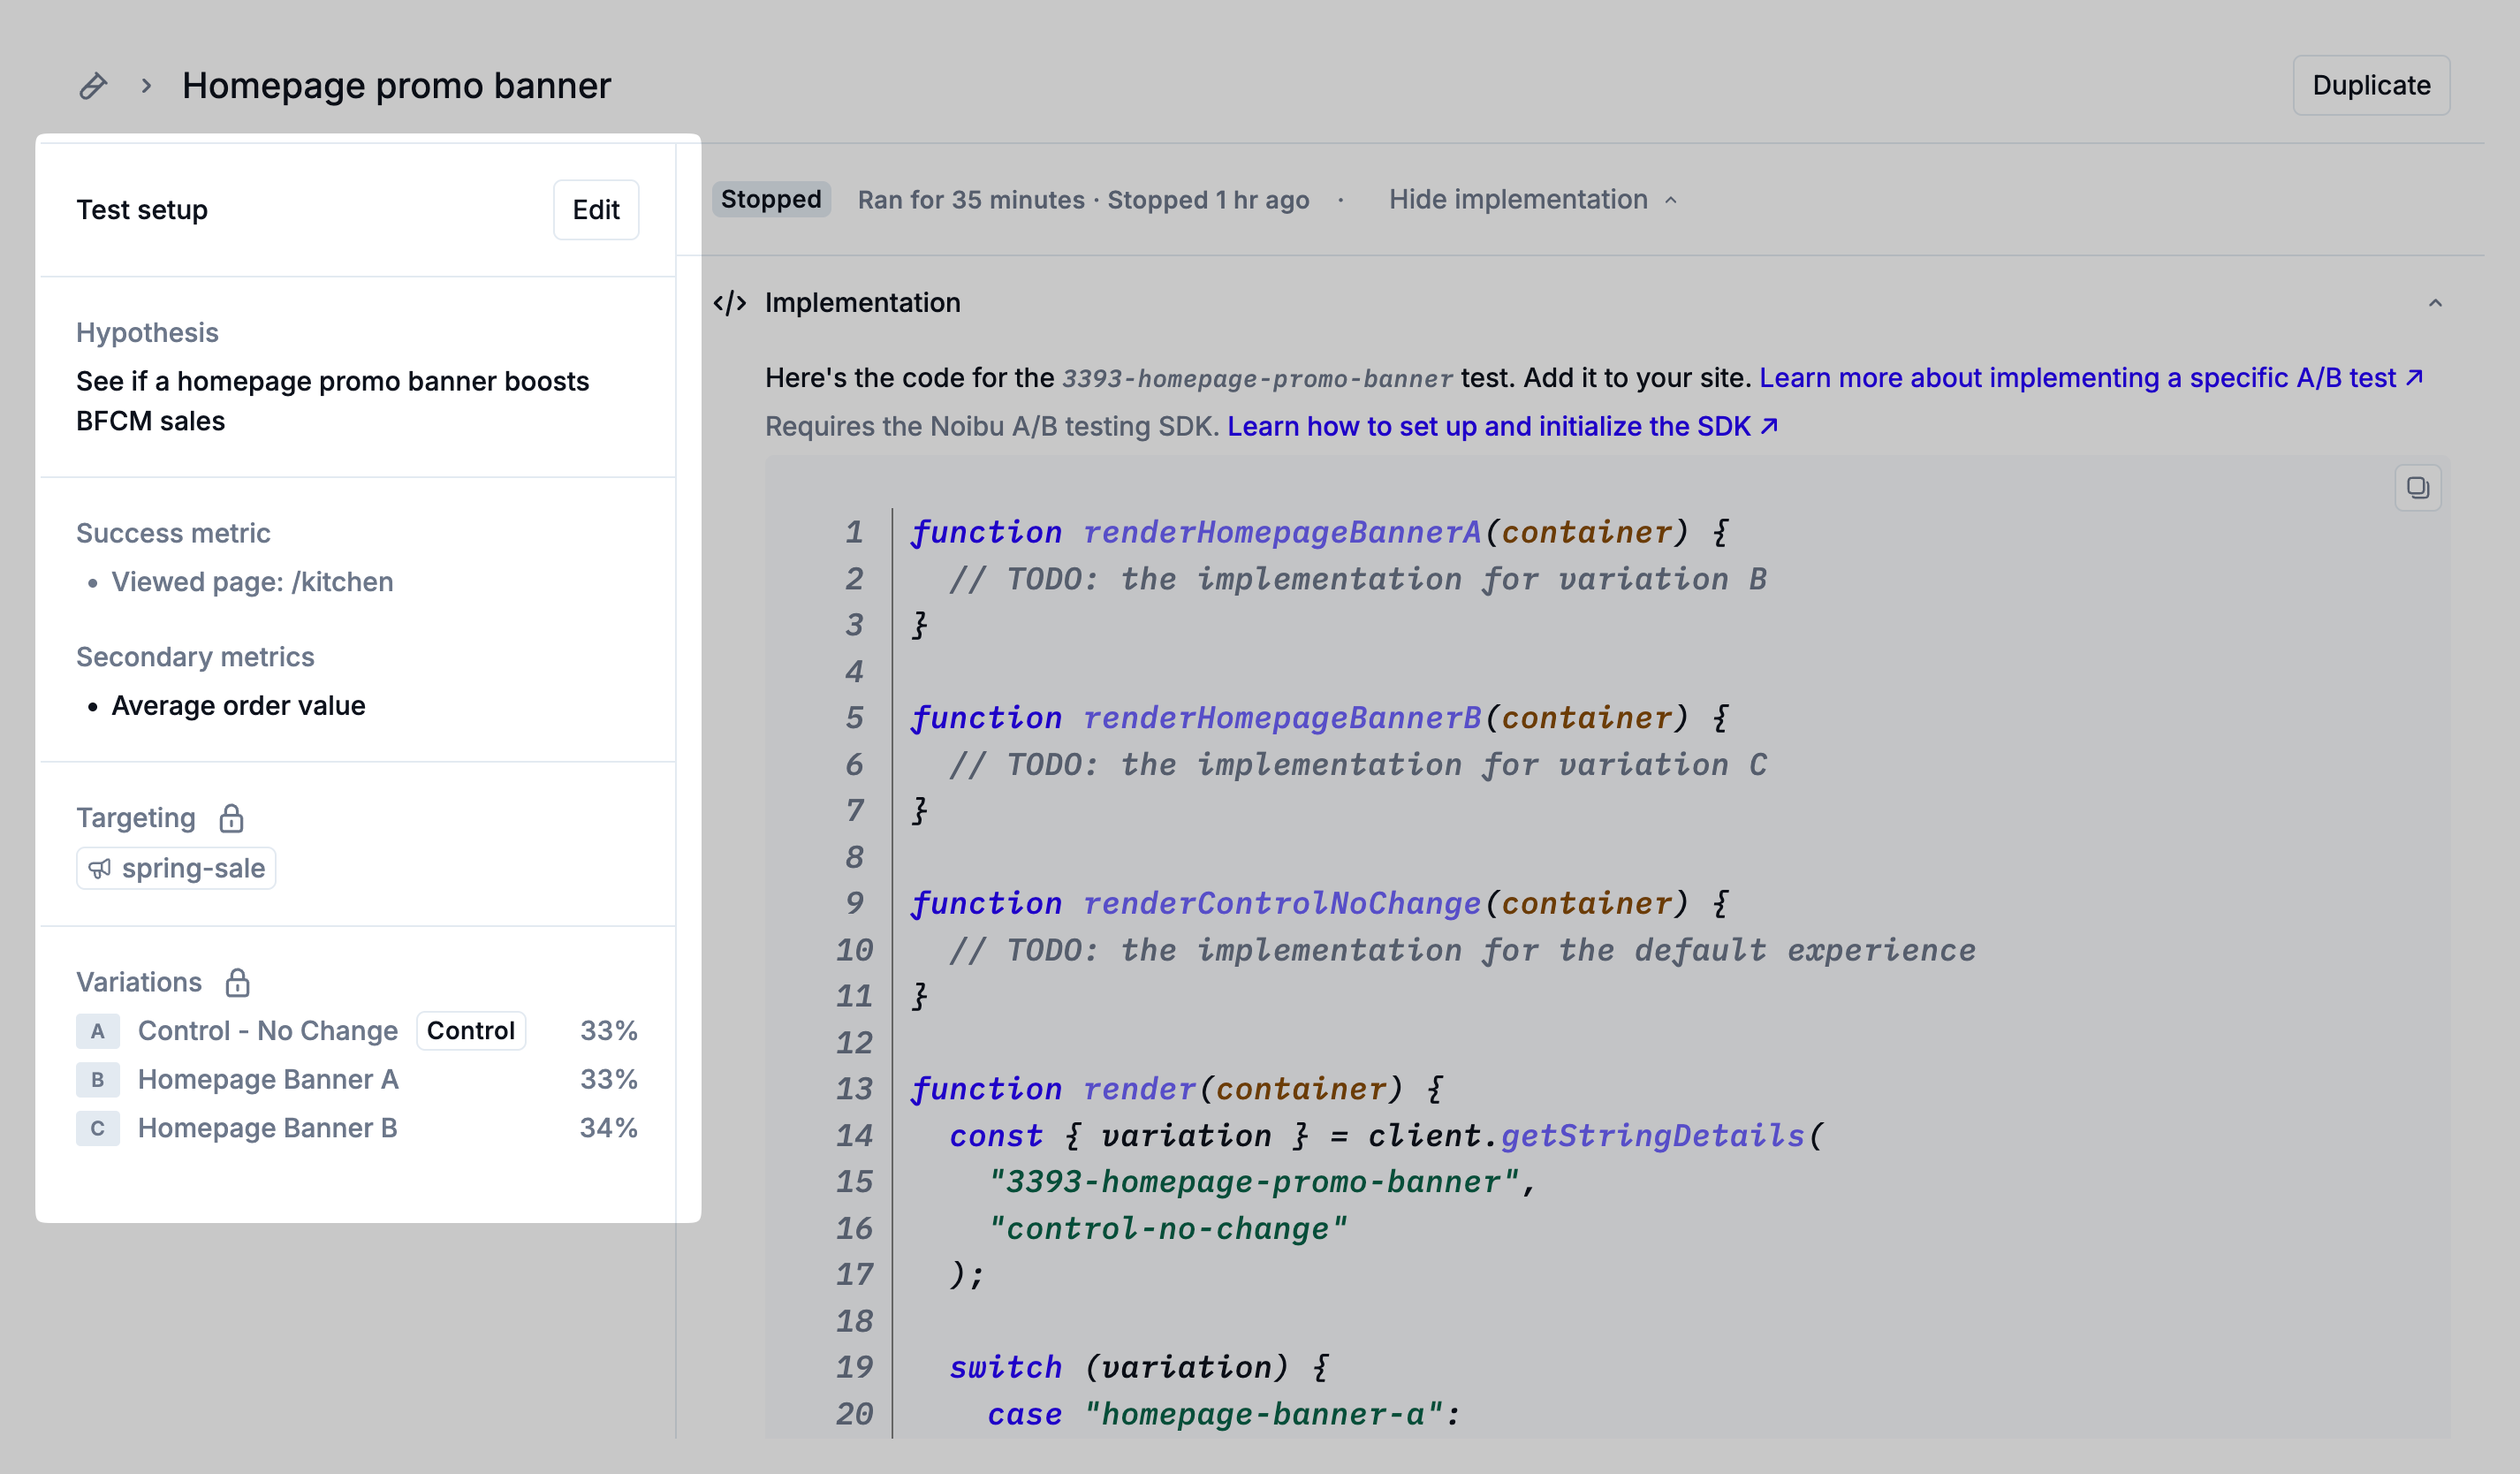
When you finish, Noibu takes you to the test page. The left side summarizes how the test is set up, and the page also provides the code snippet your developers need to implement it.
Success metrics
Every test has one primary metric and can have up to three secondary metrics. The primary metric decides the outcome. Secondary metrics give you directional context — for example, to check whether a change that lifted add to cart also affected order value — but they never affect which variation wins.
The following are available as a primary metric:
Add to Cart Rate — the percentage of sessions that add at least one item to the cart.
% of Checkouts Started — the percentage of sessions that begin checkout.
Checkout Conversion Rate — the percentage of sessions that complete checkout.
Viewed Page — the percentage of sessions that reach a page you choose. When you select this metric, Noibu prompts you to enter or select the URL of the page you want to drive visits to.
Additionally available as a secondary metric are:
Add to Cart Rate
% of Checkouts Started
Checkout Conversion Rate
Viewed Page
Average Order Value — the average amount spent per order. Available as a secondary metric only.
Choose the primary metric closest to the outcome you want to improve, and make sure it aligns with your hypothesis. These metrics come from data Noibu already collects, so a test needs no new tagging, event setup, or other instrumentation to be measured.
Targeting rules
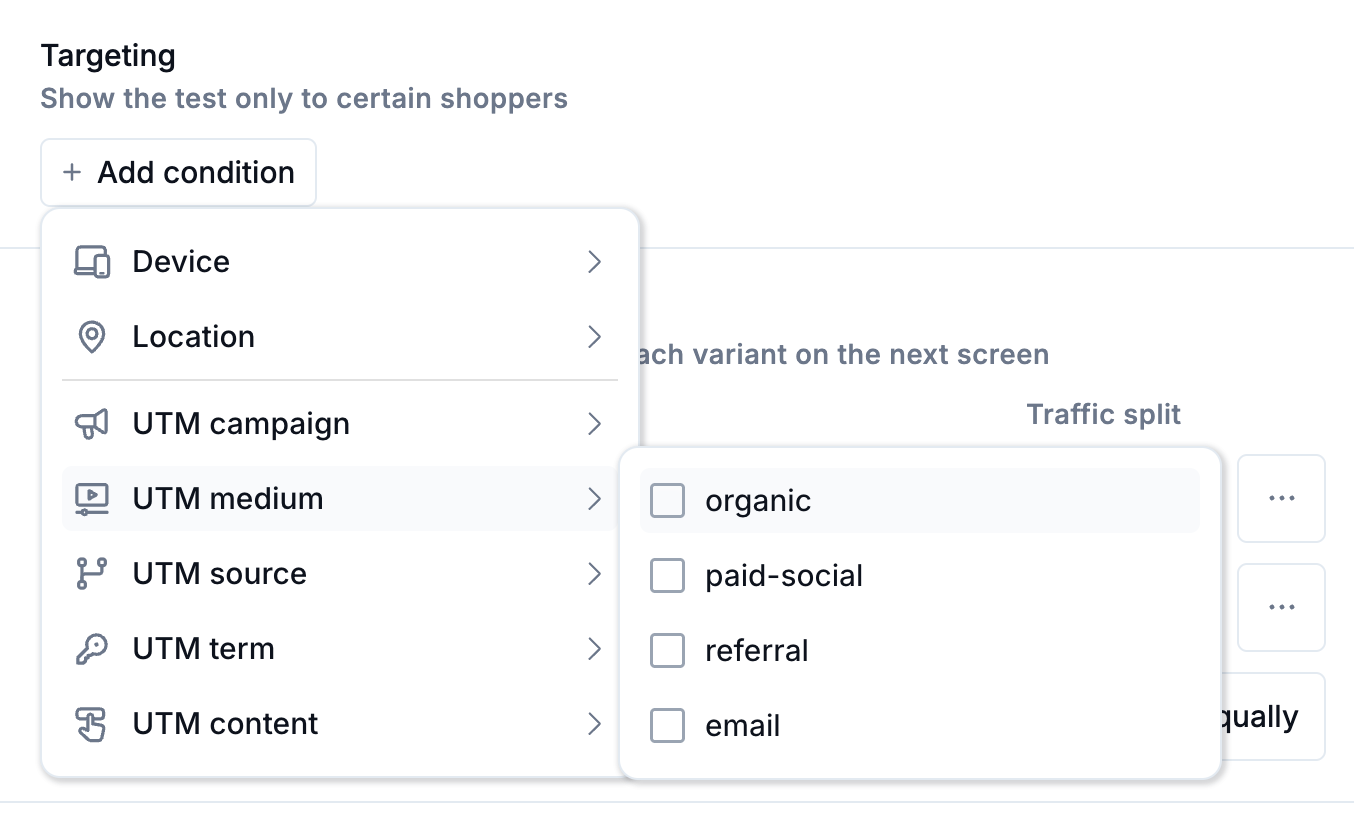
Targeting is optional and determines which subset of visitors enters the test. If you set no targeting rules, all visitors are eligible.
You can target by:
Device — mobile or desktop.
Location
UTM parameters — campaign, medium, source, term, or content.
Targeting is useful when a test is only relevant to part of your traffic. For example, you can limit a test of a promotional landing experience to visitors arriving from an email campaign, so the result is not diluted by visitors who never saw the campaign.
Note that visitors who do not match your targeting rules always see the control experience. They are never assigned to a variation, and they are not counted in the results.
Variations and traffic split
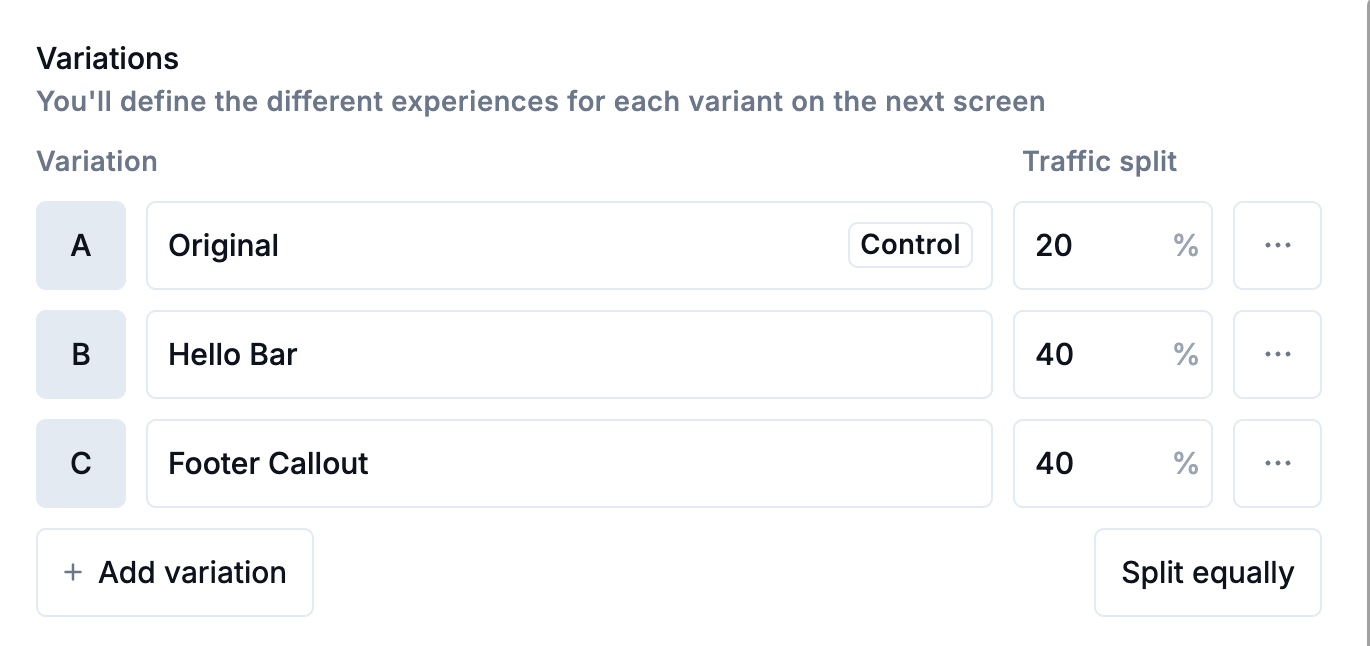
A test needs at least two variations. By default, Noibu sets up an A/B test with a 50/50 traffic split, where variation A is the control and variation B is the challenger. The control is your current experience.
Click Add Variation to add up to three more variations, for an A/B/C/D test with four variations in total.
Assign the percentage of traffic routed to each variation. The percentages must add up to 100%.
Click Split Equally to divide traffic evenly across all variations, or enter each percentage manually.
Noibu estimates how long the test needs to run to reach a verdict, and updates that estimate as you adjust the targeting and traffic split. A narrower audience or an uneven split takes longer to reach a verdict, because the smallest arm governs how quickly the test accumulates enough data.
Starting the test
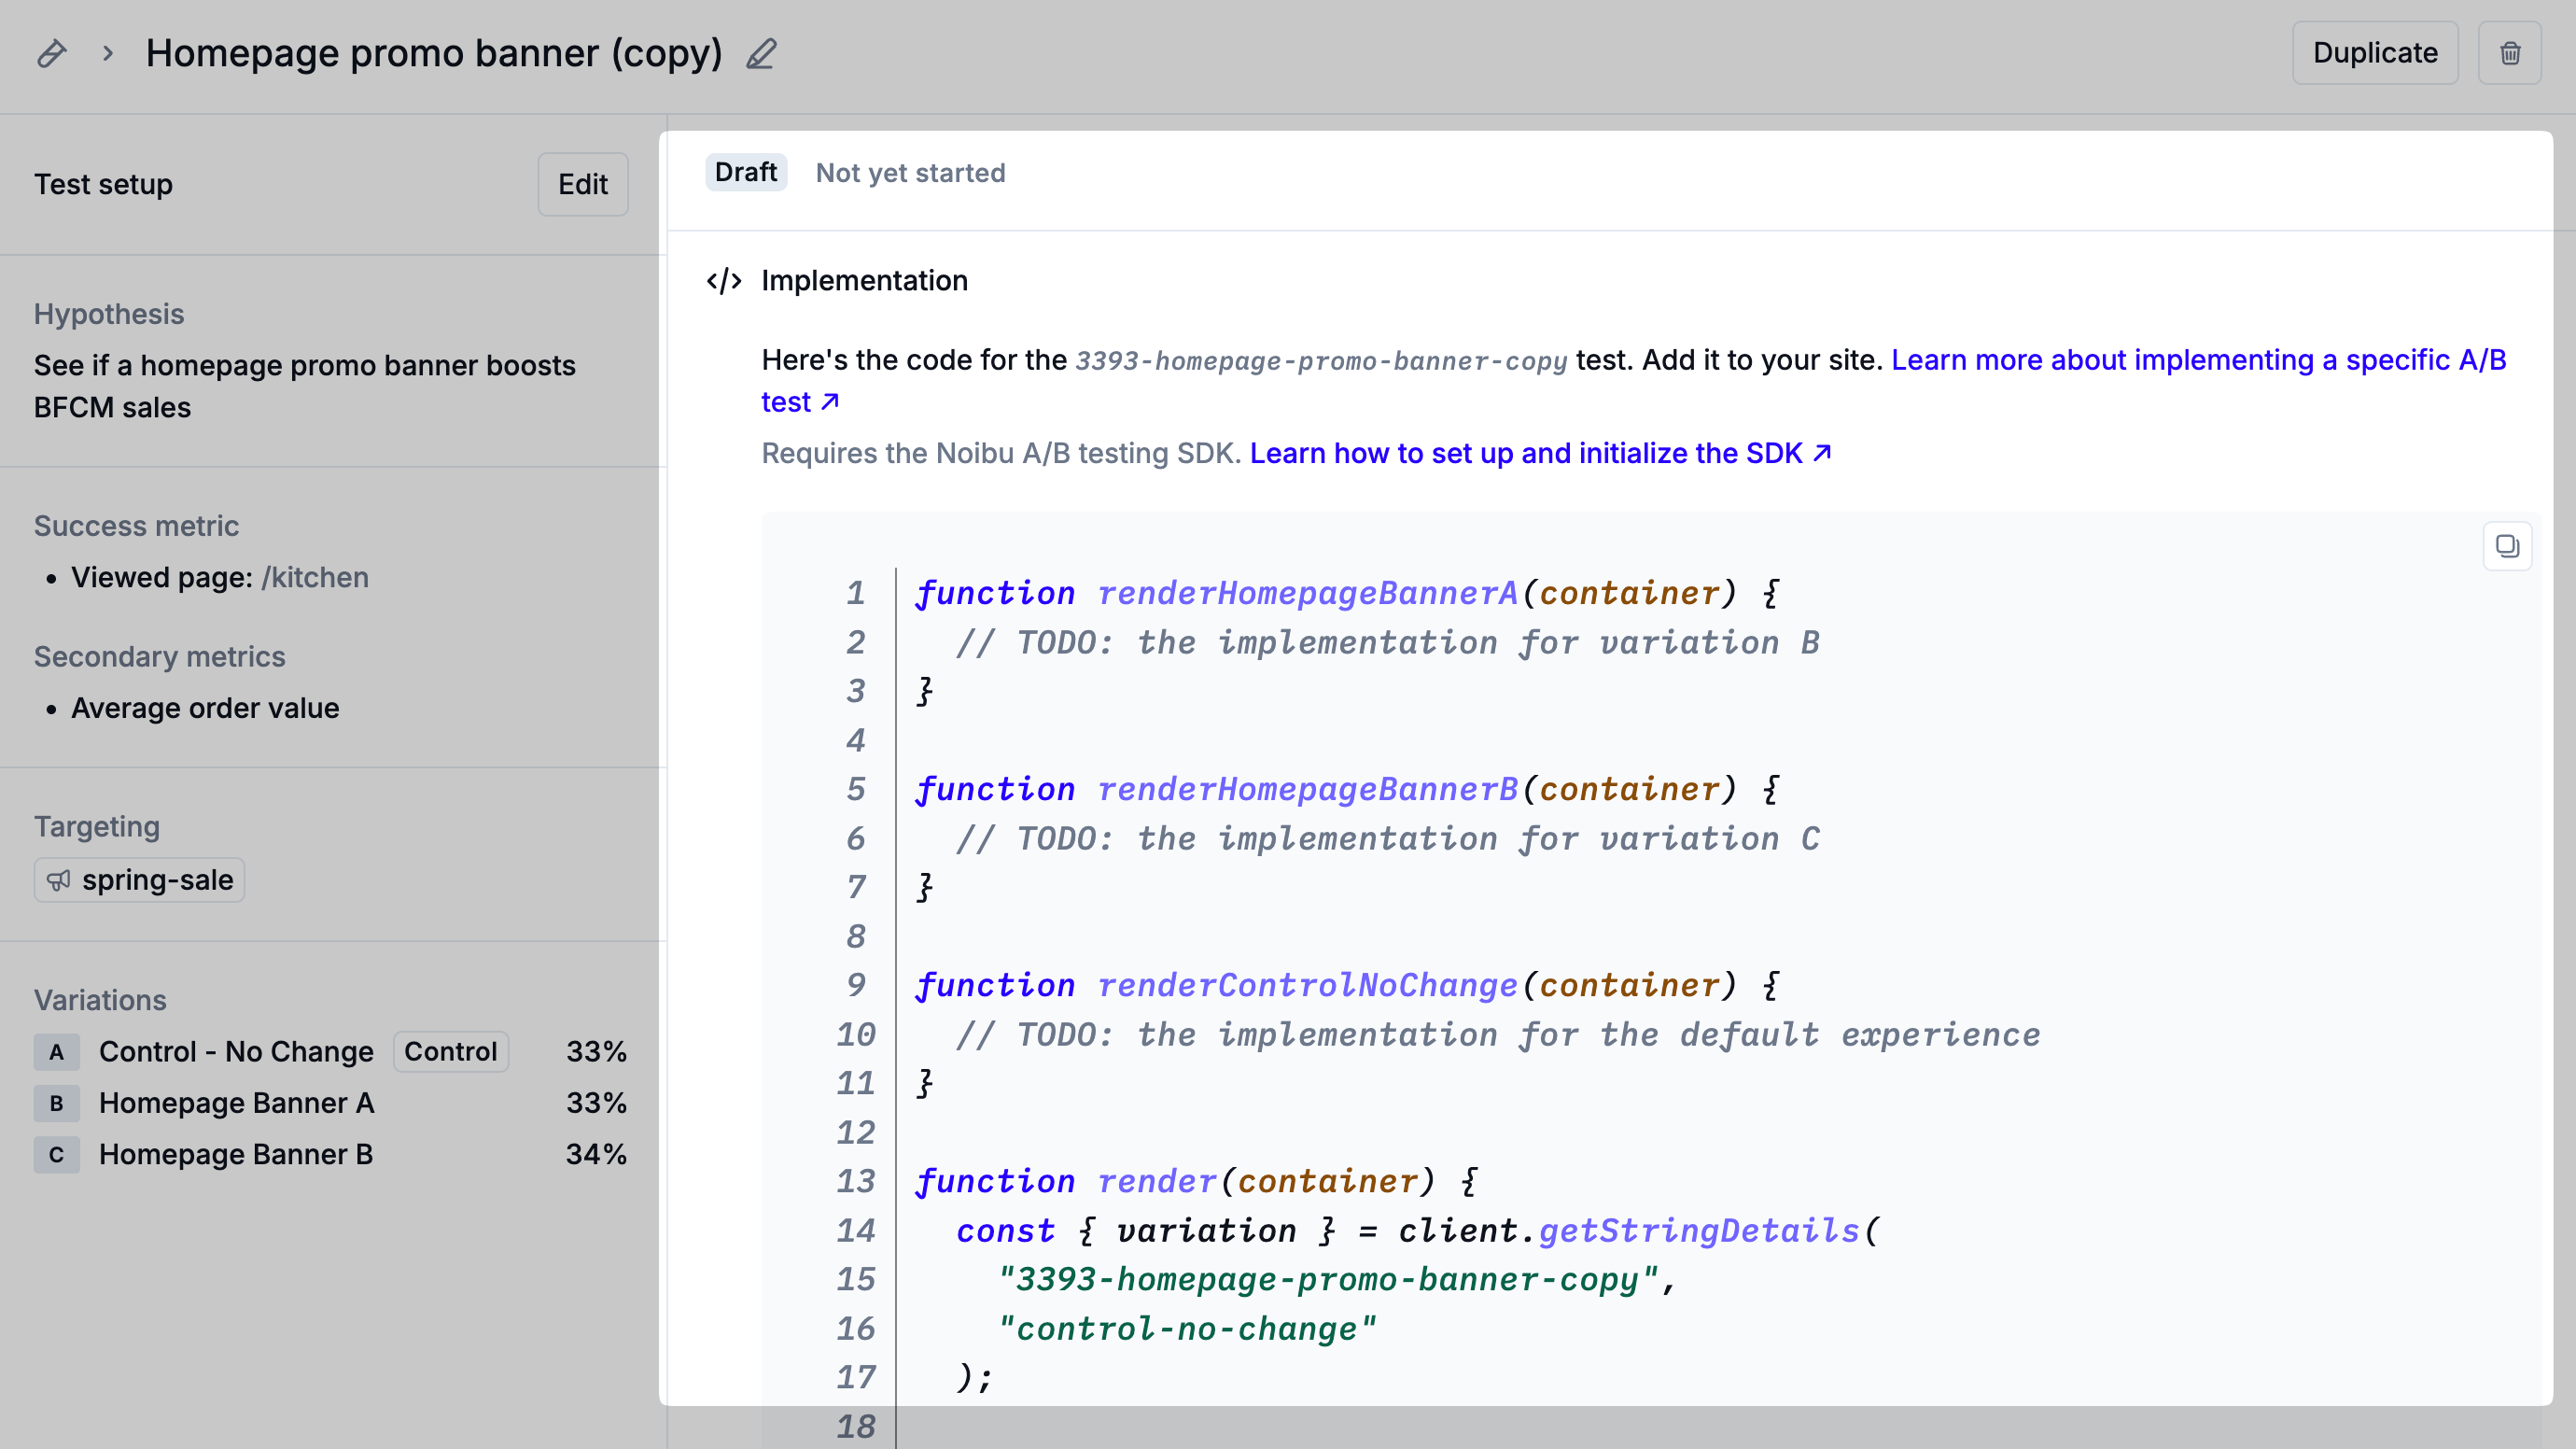
After setting up your test, it will be in a Draft state. While it is in draft, you can edit the definition, and no visitor is assigned to a variation.
Send the code snippet from the test page to your development team. Once they have implemented every variation and deployed the code to production, click Start on the test page.
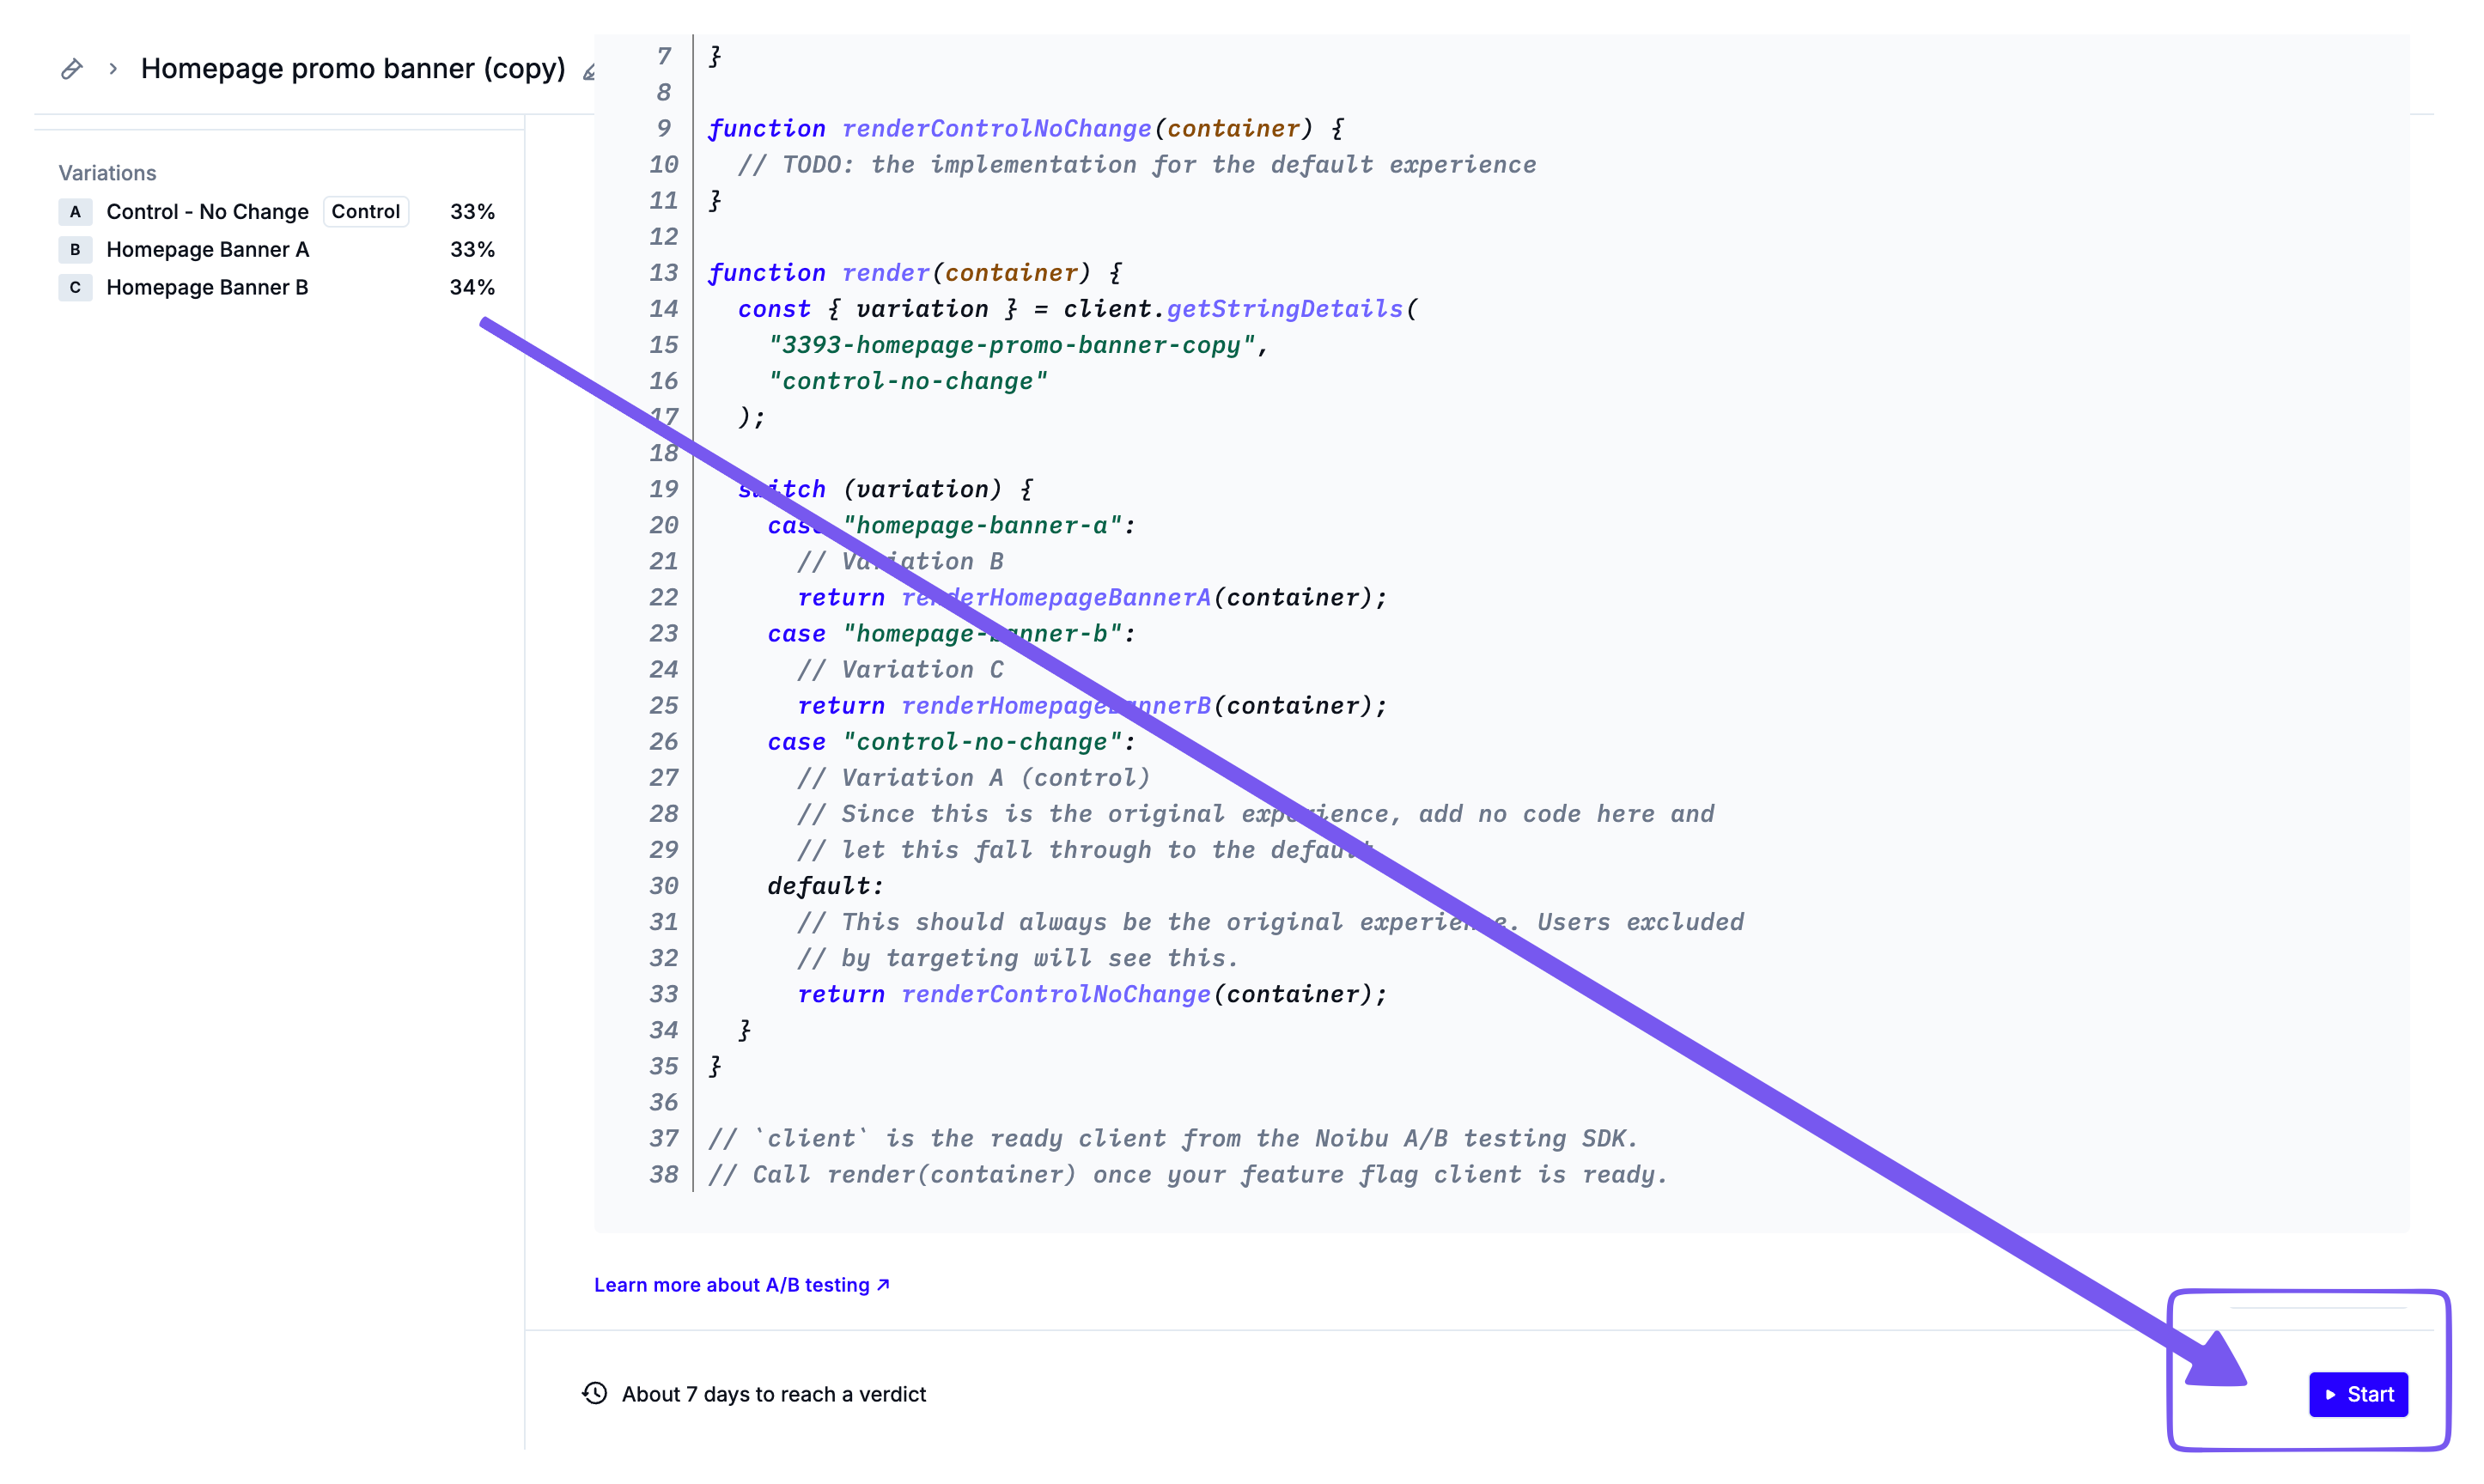
Important: Do not start a test before your variation code is live in production. Noibu begins assigning visitors to variations as soon as the test starts. If the code for a variation is not live, those visitors see the control but are still counted under that variation, which mixes two experiences under one set of results. You cannot correct that data afterwards.
Once a test is running, Noibu locks the variations, the traffic split, the targeting rules, and the primary metric. Only the hypothesis and the secondary metrics remain editable. Plan your variations before you start.
Next steps
Implementing an A/B test — the code your developers write to render each variation.
Measuring A/B test results — reading the verdict and the health checks once the test is running.